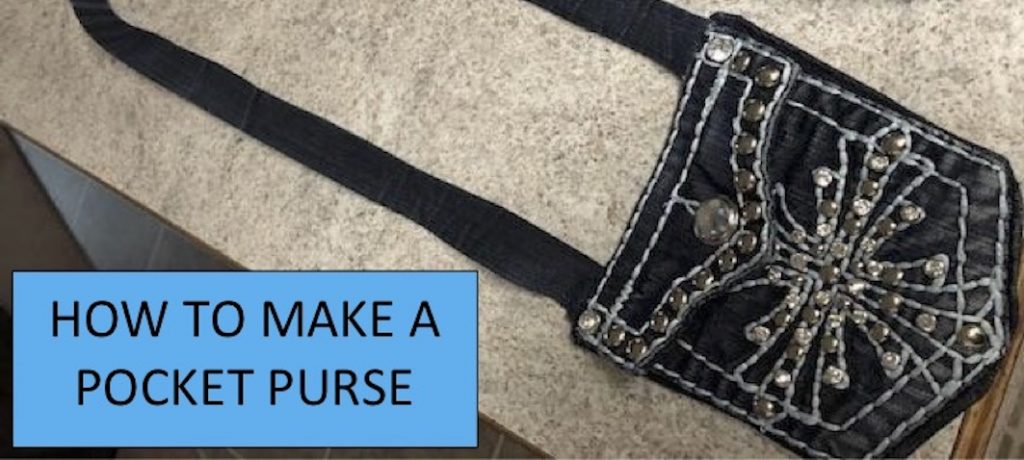
There are many ways to make your own purse. In this article, we will focus on make a purse out of an old pair of jeans. Specifically, out of a pocket. These kinds of purses are small and great for kids, but adults can use them too. Pocket purses are very popular and stylish at the same time. Anything you would carry in your back pocket, you can carry in this unique purse.
All you need to make a pocket purse is an old pair of jeans. Cut around the pocket, and make a back out of the same jean material, or use something else. The sky is the limit so let your imagination go wild. You can use reinforcements inside to make it stiff, or just leave it without.
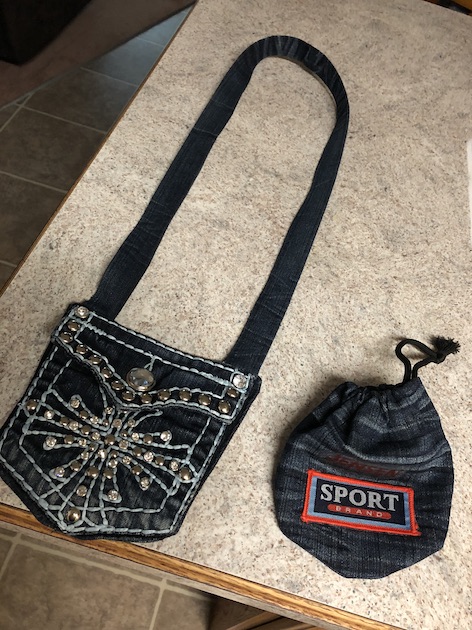
I made a denim pocket purse for my grand-daughter for camp. She loved using it for change, lip gloss, and whatever else she could manage to fit in there. Usually, it was more than the pocket could hold, but as she grows, she can use it as a teenager, or even right into adulthood.
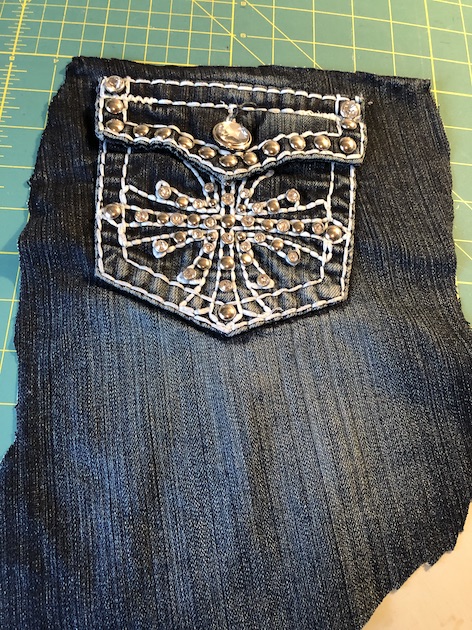
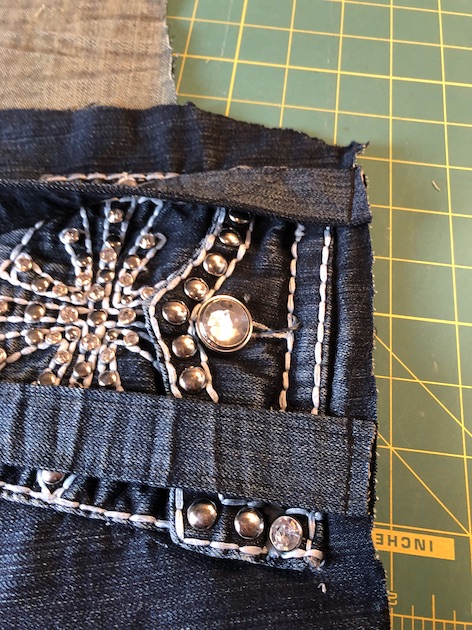
The particular jeans I chose to make the pocket purse out of were bling jeans. When considering what type of jeans to use, decide whether you want the purse to be flashy or casual.
STEP 1 – CHOOSE A PAIR OF JEANS
I chose my best pair of bling jeans but you can choose a casual pair of jeans. It depends on what kind of purse you want to make. If you want a casual purse for every occasion, you might just want a basic pair of jeans.
Don’t be afraid to bling out a casual jean pocket though. You can really get creative if you want. It can even turn into a great craft project for your kids. You can add glitter and buttons. You can use a glue gun to put sequins on or beads. You could even hand embroider your own unique design.
I love these pocket purses for that reason. You can make it your own, or use the design of the jeans.
For my grand-daughter, I decided to use the design of the jean because they were already bling jeans and I didn’t want to mess with that. Take a peek at the jeans I chose for this project.
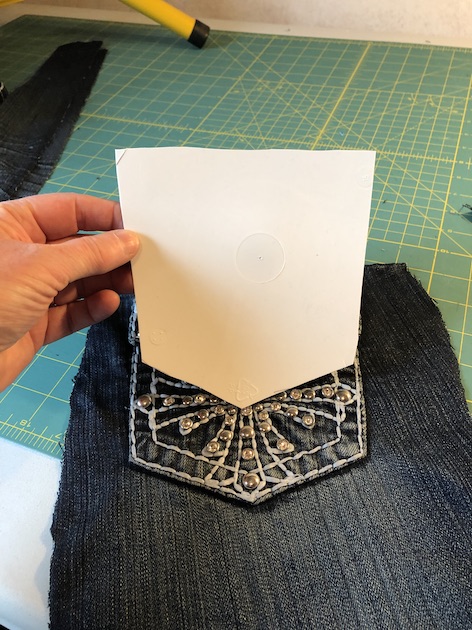
STEP 2 – CUTTING IT OUT
When cutting the jean pocket out, make sure you allow at least 5/8″ seam allowance to sew around it. It’s good to have a little wiggle room, so allowing 1 inch around the pocket is a good idea. You never know who it will look, or if it will be crooked so plan ahead.
If you cut the jean material around the pocket too closely to the seam, you will have difficulty sewing the purse. There will be too many layers to sew through. Your sewing machine will get stuck and it will become frustrating.
However, you could also glue-gun the project without ever having to touch a sewing machine. The choice is up to you. I love to sew, so sewing was how I chose to complete this project.
STEP 3 – MAKING THE BACK
I chose to make the back out of the same material as the front, but without the bling. I could have used the other pocket for the back if I wanted to. It would have been easy to glue the two pockets together, or even sew them. If I would have sewn them, I would have had to make sure I sewing the pocket off the edge because the thickness would have been too great.
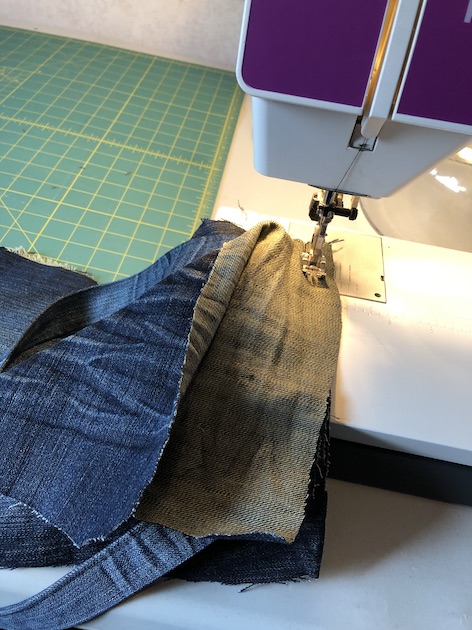
Instead of sewing two pockets back to back, I chose to cut a square the size of the pocket (plus 5/8″ seam allowance) as the backing of the purse. I turned in the seam allowance and started sewing just off the pocket top so it wasn’t so thick.
STEP 4 – REINFORCEMENT
You can add reinforcement to your pocket purse if you like, or leave it without. I chose to use a plastic reinforcement because I didn’t want the purse to hang all floppy. Since it was going to be for a little girl, and there was a lot of bling on it, I wanted to make sure it holds its shape so people knew it was a pocket made into a purse.
I used an ice cream pail lid and cut out the size of the pocket, (less) the 5/8″ seam allowance. I say less because you want the plastic reinforcement to slide right into the pocket once the front and back sides are sewn together.

I turned in the 5/8″ seam allowance on the tops, and both sides and sewed them shut. Once I did that, I slid the plastic reinforcement right up to the bottom of the pocket and then sewed the bottom shut.
You have to be careful you don’t hit the plastic inside the pocket once sewing it up, because the needle will get stuck. A sewing machine needle isn’t meant to sew through thick plastic lids.
One thing I wanted to mention, was the top of the pocket. A lot of people think you have to leave the top open so they can put stuff in it. But that is incorrect (unless you want to make it that way). But generally, a pocket purse is just that. You only have access to an open pocket, just like a pair of jeans.
You want to close up the top once you have your straps in place. You pin them on, then sew the top closed. We’ll go over the strap in the next segment.
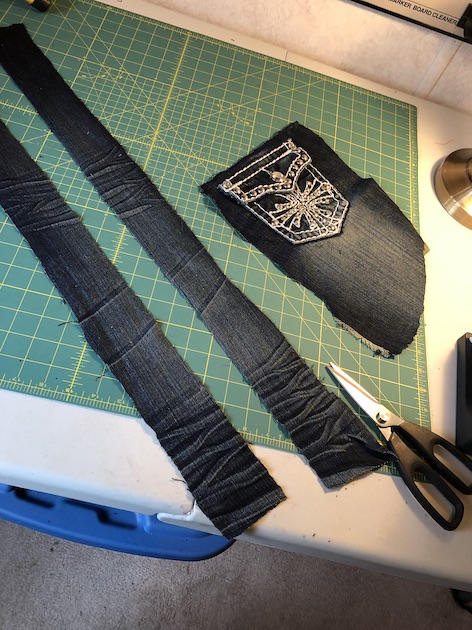
STEP 5 – THE STRAP
The strap can be made out of anything. I chose jean material because it matched with the rest of the purse. I like the look of it and it wasn’t very hard to make. I cut out a 4 1/2″ long strip of denim from the leg, the length of the strap. You can choose whatever length you want.
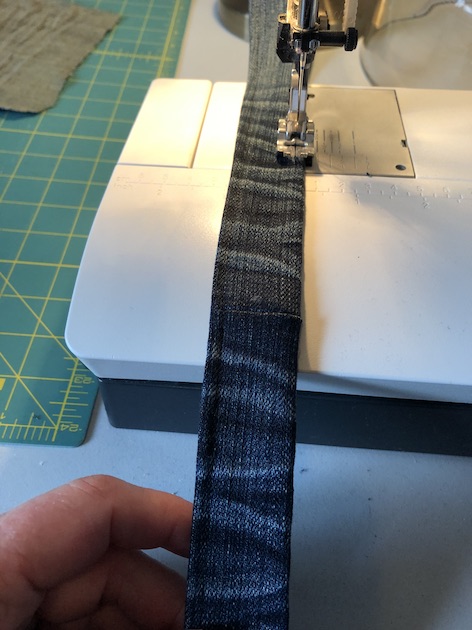
I folded the strap into a 2″ strip, inside out, and sewed up the length to make a tube. I then turned the tube right side out and tacked the ends on the top of either side of the pocket. I sewed it up, going over the ends a couple of times making sure it wouldn’t rip away once done.
Straps are pretty easy and can be made any way you like. You can even decorate the straps with iron-on embroidery, buttons, or whatever you like. I didn’t put anything on my strap because it had so much bling on the pocket. Too much of a good thing is often too much.
STEP 6 – SEWING TECHNIQUES
There are many kinds of sewing techniques you could use to construct your pocket purse. You can hand sew the whole thing if you like. You can use embroidery thread to sew the whole thing decoratively. You can use a glue-gun and not sew at all, or you can use a serger.
Most people use a single needle sewing machine. I did. I found it was the easiest and fastest method. I used the heaviest need I could find as well because I didn’t want my needle to keep breaking.
We will discuss supplies in the next segment.
STEP 7 – SEWING SUPPLIES
You will want to use a good brand of sewing machine needles. Schmetz caries the most reliable brand of sewing machine needles on the market. I never have breakage issues with these needles. Also, the best size needle for denim is the largest. Size 16.
You can find them on the following Amazon affiliate links below.
I don’t really fuss with the type of thread I use. In fact, with this project, I just used a serger cone thread on my single needle sewing machine. It worked fine. You don’t have to use denim thread unless you want to.
A good pair of dressmaker shears are a must. You could also use pinking shears if you want. Make sure your scissors are not dull, whatever type you use. You don’t want to become frustrated cutting through denim. Getting stuck is not fun!
You’ll want to use pins to hold everything together while you sew. When turning under two hems at the same time, things can get a little difficult if you don’t pin them in place.
CONCLUSION
In conclusion, I am quite happy with my little project, and my grand-daughter is too. In fact, I wanted to keep this unique pocket purse for myself, but I loved giving it away as a gift just as well.
I could find a lot of great uses for it. Who wouldn’t love a light-weight purse to throw over your shoulder? You could carry your cell phone in it, or your money, or your spare change and your shoulder would never ache.
I think I may make myself one of these amazing pocket purses. I wonder if Nana can use the other pocket to make a matching nana/grand-daughter purse. Would that be too crazy?
Perhaps!
Regardless, I am so happy with the outcome of this purse. It was a fun project, and I’d highly recommend trying it as a solo project or a class project. It only requires basic sewing skills or crafting skills depending on how you want to construct it.
If you’d like to see a compilation of my pocket purse project on Youtube, click KatFit Stitch.
HAVE FUN!