When my grandson goes anywhere, he stuffs his toys in his big sister’s bag. That causes her bag to become overloaded resulting in numerous fights over who gets to put what into the bag. Usually, big sister wins out. Solutions, little brother needs a bag of his own.
Toddler tote bags are easy to make and are often big hits especially if monogrammed with their name. You can use a basic square construction with a single strap, or make it your own unique design. You can use new or used fabric, and decorate it any way you want.
The tote bag I chose to make my grandson was constructed out of new quilting cotton fabric for less than $20. It had to have trucks on it, and his name. That was a must!
I decided to quilt the bag, and I’m glad I did. I find a quilted bag is more durable. His sister’s bag is also quilted, but that’s just me. I love to quilt, and I love to make things for my grandchildren.

STEP 1 – CHOOSE THE MATERIAL
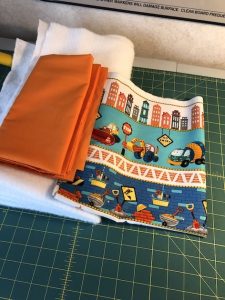
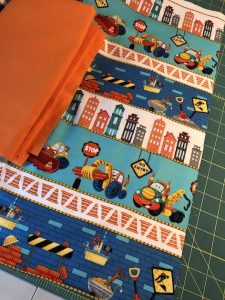
It took me a long time to find fabric with trucks on it for little boys. That’s what my grandson likes. I found everything from puppies to kittens, but not much with trucks and trains, etc.
Finally, I found some quilting cotton with a mixture of trucks and activities on it that would work perfectly. I bought a 1/2 meter of 160″ width material for the actual bag, and a meter of plain orange broadcloth for the inside lining.
I knew it would work for the tote and was eager to get started. I love making bags. They are so easy!
STEP 2 – CHOOSE THE DESIGN
I wanted to make the tote bag the same size as my grand-daughters bag. It had to be exactly like his sister’s or I know he wouldn’t like it. It had to fit just as many toys as well.
I think I made the tote a big bigger than my granddaughter’s ‘SKYE’ Paw Patrol bag, just to make my grandson feel special. I wanted it to be square, and have a single strap from side to side. I find those kinds of straps to be best because a child can strap it across his shoulder to carry it.
I made the tote out of a long rectangle shape. Because it had a pattern going one way, I had to cut the bottom into two even squares so that the pattern would be the same on both sides.
Really, you can make a child’s tote bag any shape or size that you want. You just have to be creative and use what you’ve got. If you only have two 4 inch squares, then use them. If you have a 6-inch long rectangle, then use it. Make it any size you want, any shape you want.
Basically, the construction is easy. Just sew up the bottom and two sides.
Of course, I quilted the bag (which you don’t have to do) so that meant a few extra steps, but for me, it was worth it. We’ll go over how I quilted the bad in the next segment.
STEP 3 – QUILTING THE BAG
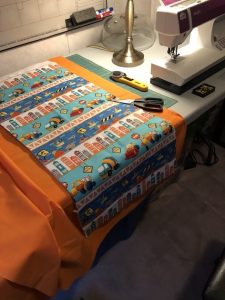
I had leftover quilt batting I bought by the meter, back when I made my son a wedding quilt, so I just used a piece of that. It was the right shape and size.
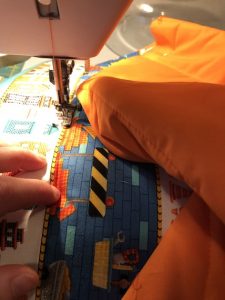
I made a quilt sandwich with the orange and the tractor fabric, with the quilt batting in the middle and then pinned it. I quilted simple lines, nothing crazy, according to the design of the material, before I cut the rectangle in half.
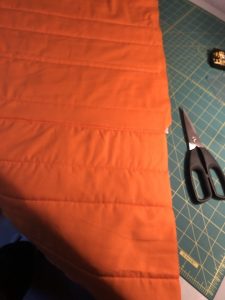
After quilting the quilt sandwich, I cut the rectangle in half for the front and back. I won’t give dimensions because you can make your own tote any size. Really, that is up to you regarding the size.
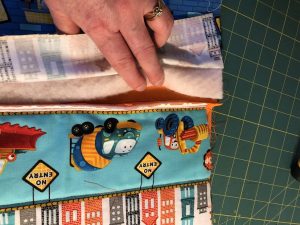
Once I had two squares to work with, I quilted them together using the quilt-as-you-go method. That’s where you blend two pieces into each other and topstitch them together. It looks like it’s supposed to be together like that. The reason I did it like this is to turn around the pattern so that both sides were running in the same direction.
Once the front and back were sewn together, I just sewed the sides together, with a wide binging I incorporated into a strap. My own design. You can actually make straps however you want and attach them to the top, but this was just my own unique creation.
I’ve got a Youtube video on the compilation if you’d like to watch that HERE.
STEP 4 – THE STRAPS
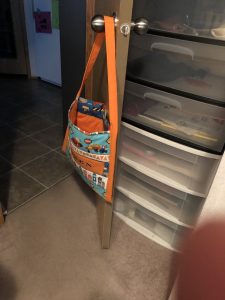
The straps were a uniform design I created myself. The U shape stems from the bottom, looping around from one side to another. I wanted it to look like a wide quilt binding and it did just that.
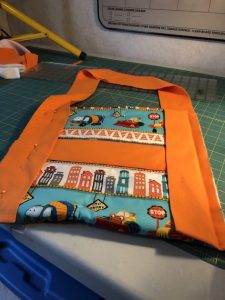
The finished product created a handle that a toddler could how onto easily. Often times, tote bags have two handles. When a toddler grabs on to one side, he loses the other creating a lopsided bag, dumping the content out.
With a U shaped, uniform strap, there is only one thing to hold on to, and mommy or toddler can hold it, drag it, or drape it across the shoulder.
STEP 5 – MONOGRAMMING
I monogrammed my grandson’s bag by using t-shirt transfer paper. It isn’t expensive and can be purchased in any store where they sell computer supplies. I got mine at Staples.
If you have an embroidery machine, you can embroider your child’s name on the bag, or iron on embroidery letters as well.
Transfer paper is only one way to monogram a bag.
The way transfer paper works is you bring up a word document on your computer, or whatever writing program you use. I like Microsoft Word. I find a font I like, and type my grandson’s name in big bold letters. I flip it over because it has to be backward.
Then I print it on to transfer paper. Basically transfer paper has wax on one side, and paper on the other.
I then cut it out and press it onto the bag with an iron. Once cooled, I slowly peel off the paper and the name appears on the bag. It’s really quite amazing. I like this part because it seems to finish off a tote bag quite nicely.
Up until this point, it is just a tote bag, but when you see your grandchild’s name on the bad, it becomes theirs!
STEP 6 – SEWING SUPPLIES
You will need a strong sewing machine needle. I like to use Schmetz needles because they seem to be stronger than any other need I’ve ever used. Other ones bend and break so easily.
You can check out some supplies on the following Amazon affiliate links below.
You’ll want to use a large size needle simply because you’ll have to go through a few layers. If you’re a quilter, you can use your quilting needles but you don’t have to. This is just a bag even though I quilted it.
You’ll want to use good dressmaker shears or a rotary cutting wheel. I used a rotary cutting wheel because I love cutting cotton with it. I find it gives me crisp clear edges to work with.
You’ll also want to have pins at hand. With a project like this, you don’t want anything slipping around or getting out of alignment. The end result would be a warped tote bag.
I also used a quilting ruler, but you can use a measuring tape or ruler. It’s not that big of a deal what you use, just make sure your sides are even when you cut it out.
STEP 7 – SEWING TECHNIQUES
If you’re a crafty person, you can actually use a hot glue gun to make a toddler tote bag. Really, it’s up to you how you construct it. You could use denim or plastic. Imagine using an old yellow rain-coat and making a Curious George bag. If you’re working with a rubber raincoat, you could certainly glue it together.
You could use your serger if you have one. I’ve used my serger to make a tote bag before. It gives you clean finished edges in a short amount of time. I love my serger!
For this project, I used my single needle sewing machine. I decided I didn’t need anything but that since I was quilting the bag and did a lot of top-stitching.
But you can use whatever technique you want to make your tote bag. That’s why I love sewing because I can design things the way I want and make it my own.
CONCLUSION
In conclusion, I am happy the way my grandson’s bag turned out. He was happy with it as so was his mother who now doesn’t have to worry about the kids fighting over one bag. They each have their own, and they are proud to tote around their OWN bag.
I’m glad I went with new fabric for this bag because I couldn’t find the right material anywhere. I needed trucks and not many things had trucks on. Yes, I could have used an old bedsheet to make this tote. I’ve done that before with great results, but usually, trucks are hard to find on sheeting.
I’m also glad I quilted my grandson’s tote bag because it’s durable and doesn’t flop over. He can put anything in the bag and not have to worry about it breaking or flopping over.
If you’d like to make your own tote bag for a toddler or yourself, just be creative. Use the general ideas I’ve written about here and make it your own. Imagine what ideas you can come up with.
But be sure to monogram the bag in some way because there’s nothing like a child smiling because they are toting around a bag that says their name on, made with love from Nana!
HAVE FUN!