Do you know how to make a pattern fit? You can either use the Tissue Fitting method, or make a Muslin Mockup. Let’s discuss the difference.
For me, sewing is an art. I love creating and experimenting with fabrics and styles. But what if you need to make the perfect fit? What do you do? Do you use a pattern, create one from scratch, or alter an existing pattern? And if so, how?
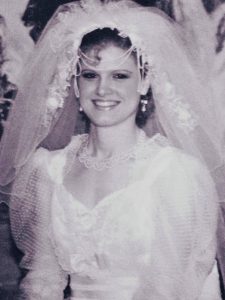
Let’s say you want to sew a wedding dress. You could walk into a fabric store and buy a pattern, choose the perfect fabric, and start cutting out the pieces.
I did this very thing 30 years ago, and I did it all by myself. I had worked at a fabric store as an assistant manager before meeting my husband, as well as a sewing factory making mens and ladies suits, and then later sewed for a new designer at home.
It was safe to say I was a confident sewer.
However, I didn’t like following patterns and I still don’t. I like making my own. But sometimes you need to follow a pattern and make adjustments. As a new sewer, you may need a pattern.
That’s perfectly okay.
But once you have the pattern, then what?
For me, I like to fit the tissue pattern to my body, piece by piece. I wanted my wedding dress to fit properly before I cut it out, so I wanted to be sure of the sizing and fit.
It’s easy to waste expensive specialty fabric if you just wing it. But winging it is my favorite, so I had to make an exception for this project. I had to follow the rules.
At the time, in the late 80’s, there were two sewers who were considered trail blazers in the sewing industry, and I followed them religiously. Their names were Pati Palmer and Susan Pletsch.
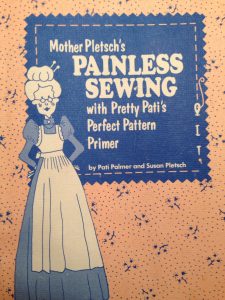 This was my very first sewing book.
Now, back then it wasn’t as easy to follow someone as it is today. We didn’t have Youtube, or Facebook. The internet didn’t exist at all. So, instead, we took physical classes to learn how to do something.
I did that.
I also bought their sewing books and used them as my go-to guide for painless sewing.
It was fun, educational, and a huge learning experience for me when it came to making my own wedding dress. Which turned out perfectly by the way.
The Palmer and Pletsch Tissue Fitting method was born from that point onward. They’ve perfected it over the years, and from time to time, when I do use a pattern, I use their amazing method rather than the alternative muslin method.
But that’s just me.
Nowadays, new sewers seem to be caught up in making muslin mockups and think it’s more professional. Perhaps it is.
But maybe not.
In this article we’re going to discuss both methods, and then decide on which one is better by going over the processes of both.
Let’s get started.
WHAT IS TISSUE FITTING?
Tissue fitting is just that. It’s the process of using the actual tissue pieces and fitting them together as a mockup. Yes, you actually wear paper.
You can use this method with whatever pattern you want to make. It can be for yourself, or for a client, or for your kids. The method works on anyone.
It’s a step by step process.
BASICS
The basics of Tissue Fitting are built around the premise that if it doesn’t fit on paper it will never fit on fabric. This is so true.
For so many people they think they must sew an entire muslin mock dress before ever touching the precious expensive fabric they bought for their project.
This is simply not true. The Palmer Pletsch Tissue Method is a real professional alternative to the old fashioned muslin method.
Why would you want to sew a garment twice anyway. More often than not, muslin mockup garments are tossed in a corner as a big oversize ridiculous dress. We forget about it and it become useless.
Many home sewers often become discouraged after making a muslin mock dress because it looks ridiculous, or they run out of steam and self-confidence to continue on to the ‘real’ project.
The Tissue Fitting method, was created to prevent sewers from losing interest, sewing double, and discarding half-done projects.
It’s easy with Tissue Fitting. Just sew once.
MEASURING AND PATTERN SIZING
With Tissue Fitting, just as in Muslin Fitting, you must make sure you buy the correct pattern. I’ll link a fitting video at the end of this post.
One of the most important rules for fittings is to fit the bust correctly. A measuring trick is to measure the overbust rather than the true bust. That’s the area around the true back, where the bra sits, and then go all around the front, under the arms, and then snuggly over the bust.
Often times when you measure the true bust, you buy a pattern that is just too big. When all you really have to do is a full bust adjustment instead.
And if you fall between two patterns like an 8-10, you should go for the lesser one. Just make minor adjustments to the bodice right on the tissue paper as you fit it to your body.
CUTTING OUT THE TISSUE PATTERN
Once you find the correct size you need, you open the tissue pattern up, and start cutting the pieces out with a scissors. Each piece has lines to follow for each pattern.
It’s a good idea to use a marker to draw a line on the stitch line where you will be sewing.
TAPING AND PREPPING THE PATTERN
You will want to use flat clear scotch tape to tape around areas on the tissue paper that curve. In doing so, you prevent the pattern from ripping.
But even if it does. Just tape it up. It’s no big deal. Some people freak out when their tissue paper rips, but it’s a minor thing. Trust me.
Once you tape the tissue paper and it’s all reinforced around places like arm holes and the neck, you can clip into the seam allowance on the tissue paper so it curves easier. Then, move on to the next step.
PINNING
The idea is to pin two tissue pieces together just as if you were sewing it. Take for example a front and back bodice. You want to pin the two pieces together on the sewing line.
Make sure the pins are pointing down. You don’t want to prick anyone.
Once the pieces you want to adjust are pinned together, you can try it on.
SEAM ALLOWANCE
Depending on the project you are sewing, there may be different seam allowances. Just remember that whatever it is, it must be for the whole garment.
A seam allowance is usually 5/8″ but if you are using a serger, you need to measure properly. We won’t go over serger seams here in this article, but I will briefly say you can serge a trial piece of material, and then measure it in relation to the 5/8″ seam on the pattern to determine where the line of sewing will be.
Some people draw a serge line on their fabric or pattern to adjust.
But as I said, I won’t go into detail about that here.
BODY ADJUSTMENTS
There are many different body adjustments you might have to make on the tissue bodice before it’s ready for the fabric. Below is a list where we will briefly go over the type of adjustments.
- FULL BUST ADJUSTMENTS – It’s far better to buy a smaller pattern. One that still fits you according to the measuring charts, and then do a full bust adjustment. To make a full bust adjustment, all you need to do is follow the cut lines in the pattern, and make it wider. Slide a strip of tissue under the cut line and tape. Then repin and measure.
- FULL SHOULDER ADJUSTMENTS – Sometimes you have broad shoulders and you have to make adjustments. Pinch the tissue in the areas where it’s too big or too small and place a pleat to the curve part of the pattern. Make sure to align your center shoulder with the seam.
- HIP ADJUSTMENTS – Like me, I have no hips. I usually have to make major adjustments here. Wrap tissue pattern around your body and pull in to adjust and pin. Make sure the straight of the pattern, usually marked with a line, is horizontal and not crooked.
- BACK ADJUSTMENTS – Some people have a sway back, and you need to pinch in a pleat in the tissue pattern. Pin and adjust accordingly.
- WAIST ADJUSTMENTS – A trick to finding the natural waistline is to wear an elastic around your waist. Line up your tissue pattern to that line on both bodice and bottom if making a skirt.
I will post some helpful Youtube videos for sizing at the bottom of this article for reference later.
MOVING TO THE FABRIC
Once you’ve perfected the tissue fitting, and alterations are complete, you can lay the newly adjusted tissue pattern pieces down on the fabric, following instruction on the pattern.
It’s important to abide by all grainline specifications on where to place the pattern pieces. If you’re not sure, please make sure you read the section in the pattern that helps with layout before cutting.
One of the great benefits of Tissue Fitting is the fact that you don’t have to take out the stitching like in a Muslin Mockup.
All you need to do with this method is take out the pins, place the tissue on the fabric and cut it out.
Easy peasy!
FABRIC/BODY ADJUSTMENTS
This is the part that many people skip. I admit, I’ve skipped it as well. But once again, when working with expensive specialty fabric, you want to be SURE it fits before you sew it all up.
I know, you can pick it all out, but trust me, picking sucks. I use to spend hours in the sewing factory I worked at, just picking imperfect stitches out.
Talk about tedious!
So, always make sure you pin together fabric pieces and try them on before sewing it all together. It will save you a headache afterward if you messed up the fitting.
Often times you find that the ‘real’ fabric stretches more than the tissue paper did. You might have to re-align something or bring a dart closer, or tuck something in that you didn’t see on the tissue fitting.
SEWING THE COMPLETED GARMENT
Have fun!
Sewers forget this part. After all the work of fitting the tissue pieces, you might forget what it’s all for. So have fun, create something beautiful, and enjoy!
The finished garment will be so worth it, and fit to YOUR specific body like a glove.
PRACTICALITY OF TISSUE FITTING METHOD
When it comes to practicality, the Tissue Fitting Method is just that. It’s easy, it’s less time consuming, and it saves the real work for the fabric.
I like this because I don’t have to sew two garments, and pick out stitches.
It’s less frustrating, and if you make a mistake you can just tape it up.
Not only that, you can re-use the pattern to make something else. And it’s not going to take up room in your closet, hanging like an awkward useless dummy dress.
Who has room for all those mock dresses?
Simply fold up the tissue pattern pieces, and file them away in the perfectly compact pattern envelope it came in.
And if you bought the pattern online, you can do the same thing. Neatly fold the paper and put it in a ziplock bag with a picture of the garment.
For me, this is an easy peasy solution to the Muslin Mockup.
But let’s take a look at that to be fair.
MUSLIN MOCKUP
The idea behind a Muslin Mockup makes sense. I’ll state that right from the start. The technique is used by designers every day.
But is it necessary when you already have a pattern you’re working from?
Isn’t it mostly for those sewers who want to create a pattern from scratch?
Perhaps you are working from a dress form, and you know what you’re doing when you drape fabric to create a pattern of your own. Then it makes sense to have a Muslin Mockup.
You can also create the pattern right from the fabric. But, you may not want to use the ‘real’ fabric to craft a pattern.
You will waste that expensive fabric.
Though I’ve done it before, I think it’s wiser to use a muslin fabric.
So what is muslin?
TYPES OF FABRIC
Muslin is just a non-stretch cotton. It’s supposed to be a non-bleached fabric that can easily be basted together. Basting is just lightly stitching something together with a wide stitch length.
The idea behind basting muslin, is that you can easily pull it apart. Um no!
I’ve tried it, and as easy as they say it is to pull apart, you still have to pick. I remember doing a muslin for a suit jacket in a class I took, and ahem… it wasn’t easy to pick apart.
But when looking for muslin, I find that the prices, though cheaper than the fabric you are buying, is still a ridiculous price.
Do you really need to spend that kind of money on a mockup?
There are other ways around buying muslin. You can buy old sheets from the thrift store. I’ve done that. It’s cost effective, and works just as well.
Although, because of the thread count, it’s not easy to pick apart the garment after the mockup is fitted.
Some people use any old material for mockups. But I’d stay away from doing that. Remember, not all fabric is created equal. Cheaper material sometimes stretches and gives where you don’t want it to.
This defeats the whole purpose of doing a Muslin Mockup.
PREPPING MUSLIN PIECES
Well for one thing, you don’t need to prewash it. Anyone who tells you to do this needs to re-think their strategy. YOU AREN’T GOING TO WEAR IT!
That means you are NOT going to have to wash it.
It’s just a pattern piece, a template to your greater project. Remember that!
Beginners forget what they’re doing and get lost in the whole Muslin Mockup project. Sometimes they even get overwhelmed with just that part of it, that they never ever get to the final ‘real’ fabric project. They just have an entire closet full of muslin rejects.
Don’t do that!
No matter what method of fitting you chose, whether that be Tissue Fitting or Muslin Mockup, just remember that those stages are the precursor to the beautiful garment you wanted to create in the first place.
BODY ADJUSTMENTS
The same rules apply as with the Tissue Fitting method which we will discuss briefly.
- BODICE – When adjusting the bodice for a muslin, you have to pinch here and there, especially in the bust area for darts. Make sure you don’t pull too tight, depending on the fabric you chose for the mockup. If it has a lot of give, chances are the fit will turn out wrong when you use the ‘real’ fabric.
- BACK – Once again, be careful not to pull too tightly as muslin can pull differently than the ‘real’ fabric. It’s especially different from tissue paper. The trick is to not let it pull at all. If you’re using a stretch material for your final garment, you might want to adjust your pattern accordingly, but as a general rule… the mockup should be exact fitting.
- HIPS – It’s important to measure the hips properly and not stretch the muslin here either. We want a mockup that is exact. Make sure you line up the grainlines and hemline horizontal and vertical so they aren’t skewed.
- WAIST – Altering a waist in mockup is important. You want to make sure it’s not too high or too low, but the adjustment needs to be done especially if you have a long torso.
TAKING IT APART
Oh the joys of picking something apart. As I stated before, I use to spend hours upon hours of picking apart a garment, or it’s mockup, when working in a garment sewing factory.
Sure, it taught me a lot, mostly patience.
Was is necessary, well yes! At least according to my supervisors who looked through my work, found slightly crooked seams, and put the garments on my ‘picking’ pile.
They wanted perfection, and that’s what they got. But it was a pain! I think that’s why I love winging it when it comes to sewing. I say anything goes, because I want to have fun.
I’m not just a maker, I’m a creator, a designer, and if I can’t have fun while sewing, I don’t want to do it.
But that brings us back to the necessity of mockups if you need a perfect fit for a special occasion or just because you want to follow the rules.
Follow the rules, but don’t forget to have fun. And for me anyway, picking apart ‘any’ garment is NOT fun!
So when it comes to Muslin Mockups, you can guess my reaction at the picking apart stage. My nose crinkles up and I don’t like it no matter if it’s basted or not!
TRANSFERRING PATTERN TO FABRIC
The one good thing I can say about Muslin Mockups is that you can draw on the pattern pieces easier than tissue, and it’s more permanent.
Any adjustments you make are clear on a muslin. You don’t have to worry about it fading away or getting wet.
It’s a more stable platform to work with.
Once your muslin is ready and all the alterations complete, you can now use it as a pattern piece to cut out your ‘real’ material.
But isn’t this redundant?
You not only have to cut out the muslin, but now the new ‘altered’ muslin onto the final fabric you will make your garment out of.
To me, that’s just exhausting!
FABRIC/BODY ADJUSTMENTS
So, as with the Tissue Fitting Method, you have to now pin together the ‘real’ fabric pattern pieces, and check one more time, at how it fits.
Yes, ONE MORE TIME!
By this point, I would be ready to throw the whole project in the garbage. After sewing double for just one garment, I would, and HAVE literally run out of steam!
But for those who have the willpower to carry on, I say go for it!
But don’t skip this part.
You STILL want to be sure your pieces will fit together like they did with the Muslin Mockup. Just because you’ve sewn the garment in muslin already doesn’t mean it will react the same in the specific fabric you’ve chosen for your final project.
It can give, and it can stretch, and it can lay differently when sewn together.
So check!
PRACTICALITY OF MUSLIN MOCKUP METHOD
If you’ve read this so far, I think you can guess what I’m going to say.
I don’t like Muslin Mockups because I don’t think it’s a practical way to sew for most people.
I think it’s time consuming and costly.
I think it’s great if you’re a designer and you’re playing around with fits and styles and creating a pattern from scratch. Even then, I question whether or not you should have to sew it together. Pinning would be just as effective in my opinion.
But if you’re just a home sewer, or even more advanced and just want to have a fun experience sewing something for yourself or others, why duplicate the process and make two garments?
Is there really a need to sew a mockup when you already have a pattern?
WORKING LONG DISTANCE
An exception to the fitting process is working long distance. I’ve sewn for people that don’t live in my hometown, and have found it difficult to create the garment without them there.
Sure, you can probably get in one or two good fittings, but after that, it’s hit and miss if the final garment will fit.
All you can do is your best.
There is always that option of altering the finished product once they come pick it up. But if you mail them the finished garment, and they try it on and it doesn’t fit, the only option is for them to send it back.
And that’s a shame.
So, sending them a Muslin Mockup is an idea. At least they can try it on and see if it fits. But a word of caution here is just because the muslin version fits, doesn’t mean the ‘real’ fabric version will. The ‘real’ fabric may stretch differently.
That can turn into a headache.
There are other options when your sew for someone long distance. You can use a dress form, or make one for the person to fit exact measurements.
DRESS FORM FITTINGS
I don’t know about you, but I’ve used some awful dress forms in my life. Not only are they expensive, but they can be very complicated to use. It’s not as easy as it looks making the adjustments to fit a specific size.
People are not just all one size, and many dress forms just come in one specific size. The ones that come in multiple sizes have usually been the junky ones I’ve used.
A better solution if you are sewing someone’s grad dress or wedding dress, or sewing your own garment, is to make your own dress form. There are several methods you can use to do this. You can make t-shirt duct tape ones, or use a paper mache method. I’ll find a DIY dress form link for you guys and put it at the end of my article.
IN PERSON FITTINGS
It’s always best to do ‘in person’ fittings when sewing for people. That way you can get the fit right, step-by-step, and make the adjustments as you go along.
No matter if you use a fitting method like Tissue Fitting, or sew a Muslin Mockup, getting the right fit can take a lot of trial and error. You just have to be determined to create the best possible fit any way you can.
Sewing is not a perfect science, no matter what people do.
And that’s okay!
THE RESULTS – WHICH METHOD IS BETTER
The end result boils down to personal preference. If you’ve always sewn with a Muslin Mockup and you’re fine with it, then go for it!
If it makes you happy, then definitely don’t change a thing.
But for me, and for many sewers who just want a simple way to fit a garment, I say hands down, that the Palmer Pletsch Tissue Fitting Method is much better.
I want to have fun when I sew, and for me, that means I don’t want to make the garment twice. I want to get on with it.
Do the fitting with the tissue paper pattern, and then quickly move on to the reason that you sew in the first place – to create beautiful things!
Have fun with your sewing no matter how you do it!
Resources used for this article
Disclosure: Crunchy Menopause is a review site that receives compensation from ShareASale, Amazon Services LLC Associates Program, eBay, and other affiliate networks whose products I review. The opinions are my own. That means if you purchase something through one of my affiliate links, I get a small commission.